Well for the last couple of months I've been busy doing an engine conversion. This was something I was considering anyway but after my TD engine died completely (siezed, suspected cracked head/block etc) the decision was made for me!
Below is a complete guide of how I did it and I've created a PDF file of the process that includes some pictures too. Hopefully this will help other people out thinking of doing the same.
You can download the PDF version at http://www.appware.co.uk/static/landy/200tdiconversion.pdf
Cheers
Richard
Land Rover 90 TD to Discovery 200TDi Engine Conversion
Parts Required
* Land Rover 90 TD
* MOT failure Land Rover Discovery 200TDi
* Disco conversion downpipe
* Disco conversion intercooler pipes
* Extended 200TDi oil cooler pipes
* New rear crank oil seal
* New clutch (clutch and release bearing)
* New heavy duty clutch arm
* New alternator and power steering belt
* New filters and gaskets
Conversion Process
Work to do to 90
* Disconnect battery and remove
* Remove bonnet
* Disconnect bonnet stay, bonnet then lifts all the way back and can be lifted off hinges
* Remove front bumper, grille, and front centre panel
* Drain coolant
* Disconnect bottom radiator hose and drain all coolant
* Remove air cleaner assembly, fan, fan cowl, and radiator
* Remove turbo heat shield and loosen exhaust downpipe at first connection
* Remove heater hoses and control cables from clips on rocker cover
* Remove breather pipes from rear lifting bracket
* Disconnect fuel pipe connections - remove fuel feed to injection pump, spill return from no 4 injector, fuel feed to lift pump, lift pump to fuel filter
* Disconnect throttle cable and remove
* Disconnect power steering hoses
* Disconnect brake servo vacuum hose from vacuum pump
* Remove engine wiring harness
* Disconnect heater plug harness from heater plug number 4
* Support engine with engine crane
* Remove engine earth strap
* Undo engine mounting rubbers top and bottom
* Raise engine, remove rubbers, lower back onto chassis mountings
* Remove starter and harness
* Remove all bell housing fixings
* Lift out engine
* Remove fuel filter from bulkhead but keep fixings
Work to do to Discovery
* Disconnect battery
* Remove bonnet
* Remove engine wiring harness from bulkhead
* Remove radiator assembly
* Disconnect cyclone hose from air cleaner hose
* Remove air cleaner hose from turbo
* Remove feed pipe/hose from turbo and intercooler
* Disconnect heater hoses from cylinder head and heater rails
* Remove bolt attaching breather pipe clip to cylinder head and move breather pipes aside
* Disconnect hoses from power steering pump
* Disconnect bypass hose from thermostat housing
* Release bypass hose from retaining clips on front timing cover
* Remove throttle cable from injector pump
* Disconnect feed pipe and spill return pipe from injector pump
* Disconnect both pipes from fuel lift pump
* Disconnect servo hose from vacuum pump
* Loosen exhaust downpipe at first connection
* Remove oil cooler pipes from oil filter adapter
* Disconnect ground strap from starter motor
* Support engine with engine crane
* Remove engine mount bolts
* Remove all bell housing fixings
* Lift out engine (I withdrew from front by angle grinding the front centre panel out of the Discovery)
Work To Do to 200TDi While Removed
* Remove flywheel cover and fit old TD flywheel cover. This avoids having to cut and retap studs in different positions
* Change the rear crank oil seal if any signs of leaks. Only use a genuine Land Rover one as its much better quality than the others
* Fit a new clutch. I found that one of the small spark plug spanners is perfect as a clutch alignment tool
* Fit new oil filter
* Replace rocker cover and sump gaskets
Work To Do to 90
* Fit a new clutch release bearing
* Fit a heavy duty clutch arm
* Remove exhaust front section
* Move clutch pipe mount from corner of bulkhead 6 inches across to the right
* Clean up engine bay and protect exposed chassis areas while you have easy access
* Cut down bottom radiator mount brackets by 3cm - Angle grind tops off, cut 3cm from height, reweld tops back on
* Hoist engine into position
* Line up bellhousing studs and attach all fixings. You may need to adjust angle to do this which can be done by an adjustable engine lifting bracket. I did it by jacking up the gearbox end
* Connect starter motor wires and connect earth lead to chassis
* Connect exhaust heat shield
* Fit engine mount rubbers
* Prepare to fit TD loom onto engine by noting colours of wires and positions of 200TDi loom.
* Remove 200TDi loom and secure TD loom to engine. All the colours are the same so connect as the 200TDi loom was. The only change is to the alternator where you cut off the connector block and use spade terminals instead; the thin white wire is no longer used
* Attach and adjust the Discovery throttle cable
* Fit the intercooler top and bottom pipes to the engine
* Fit the extended oil cooler pipes. I secured mine with a bracket as they were longer than anticipated
* Fit the internal heater pipes (steel pipe feeds rear, pipe nipple feeds front) using the old ones from the Discovery
* Fit a new temperature sensor to match the TD gauge. Depending on your old TD engine the sensor from that may fit but there are two different types so not always. Mine didn't so the temperature gauge reads just under red when it should actually be in the centre
* Fit the power steering pipes. I used the low pressure one from the TD and the high pressure one from the Discovery. The TD one still fits the bracket on the rear of the crossmember but the Discovery one is the wrong shape so you need to make a bracket to secure it to the chassis rail
* I left the header tank from the TD and used the TD radiator pipe. The bottom engine connection is slightly kinked so adjust as best you can. The smaller pipe from it that goes to the header tank needs to be extended so I used part of the old Discovery pipework and a piece of standard copper heating pipe to join the two with small jubilee clips
* Fit top radiator water pipe. I used a cut down pipe from the Discovery for this
* Fit the 200TDi fuel filter to the bulkhead (this system is simpler than the TD). You will need to extend the existing fuel hoses with 8mm id (internal diameter) fuel pipe and small jubilee clips
* Fill the PAS header tank
* Fill the water tank
* Check the oil level of engine and fill correctly (especially if you drained it all out earlier!)
* Prime the fuel system with the hand pump on the lift pump.
* Disconnect the fuel solenoid wire temporarily
* Reconnect the battery
* Turn the engine over with the ignition key which should prime the fuel and oil systems.
* Reconnect the fuel solenoid wire
* Turn the engine over with the key and this time it should fire up if all is correct!
* Check for any leaks anywhere or strange noises!
* Let the engine run up to temperature and double check for leaks again
* Mount and fit the exhaust to the downpipe
* Use the old TD air filter system and using a combination of pipes from the TD and Discovery you can just get it all to fit together
* Test that the clutch and transmission is all working. You will probably need to bleed the clutch which will have lost fluid when fitting the new clutch arm
* Refit bonnet, bumper etc
* Test drive and make any necessary minor tweaks!
CONVERSION DONE :)
Post Conversion Tweaks
* I found the turbo whistle was louder than expected. This turned out to be the top turbo hose that needed tightening up.
* Although acceleration was much improved I still found the engine lacking at the top end. This turned out to be the accelerator cable needing adjustment (in the cab) as it was only opening to about 75% of full throttle.
* After a week or so the alternator and power steering belts needed adjusting again as the new ones had slightly stretched once bedded in.
Other Information
This was the first time I’ve ever changed an engine never mind doing a conversion from one engine type to another. I’m no mechanic by any stretch of the imagination but with a half decent collection of tools, a double garage to work in, and lots of advice I managed ok so I reckon most other people could. It was a great learning experience too so I highly recommend it!
I approached the job logically and did LOTS of reading up on the web and asked advice when needed on www.landyzone.co.uk which was invaluable. I loosely based my conversion on the excellent thread by Patman on Landyzone.
Share this blog...
Monday, 30 November 2009
Wednesday, 10 June 2009
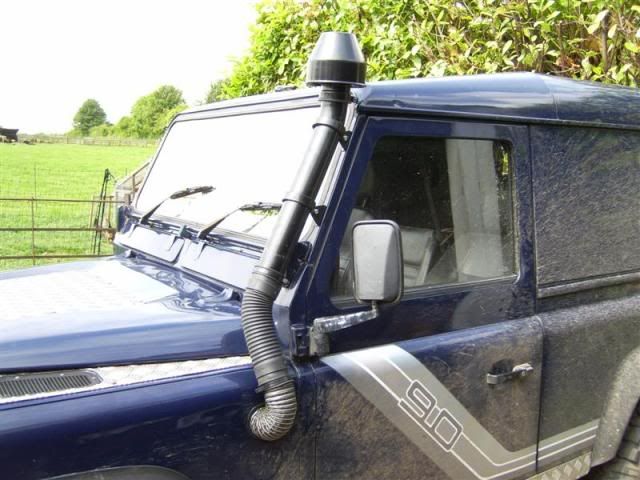
Snorkel Fitted
Well today I got round to completing the fitting of my snorkel. What I had hoped would be a simple straightword job according to the instructions turned out to be a real pain - much like everything else seems to do!
The first step in the installation instructions said to remove the vent cover on the passenger side wing. On my Landy there isn't a vent on either wing :( It turns out that at some stage in its life it has had a new wing which must have been replaced with one from a NA or V8 which don't have the vent -grrrrr!!! Because of this none of the pipework was right and I had to tackle it a whole different way...
In the end I bought a length of air duct tubing which I ran direct from the air filter all the way to the inside of the wing behind the heater box. I then had to cut a hole in the wing which was finished with kitcar edging to help stop any chaffing and then up to bottom of the snorkel pipe.
I got there in the end (over a period of days having to wait to source parts etc) and am pretty happy with the end result.
Cheers
Richard
The first step in the installation instructions said to remove the vent cover on the passenger side wing. On my Landy there isn't a vent on either wing :( It turns out that at some stage in its life it has had a new wing which must have been replaced with one from a NA or V8 which don't have the vent -grrrrr!!! Because of this none of the pipework was right and I had to tackle it a whole different way...
In the end I bought a length of air duct tubing which I ran direct from the air filter all the way to the inside of the wing behind the heater box. I then had to cut a hole in the wing which was finished with kitcar edging to help stop any chaffing and then up to bottom of the snorkel pipe.
I got there in the end (over a period of days having to wait to source parts etc) and am pretty happy with the end result.


Cheers
Richard
Friday, 1 May 2009
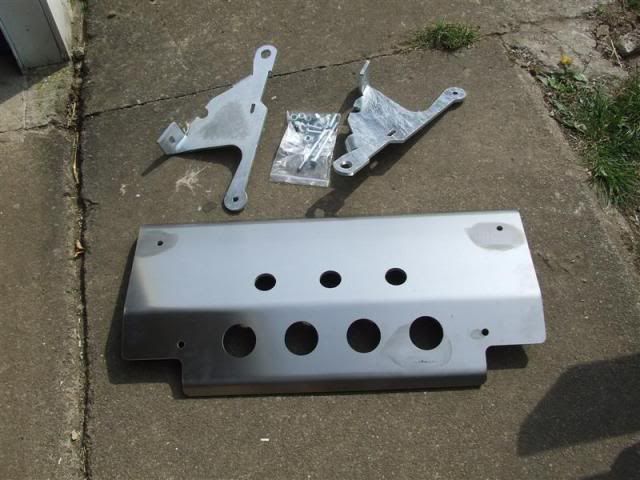
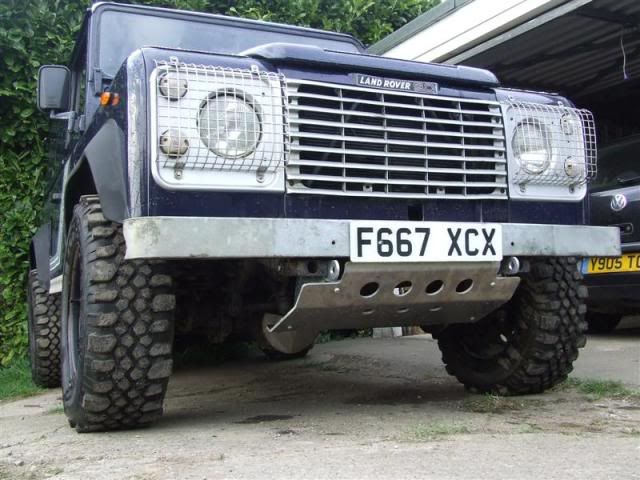
Fitted steering guard
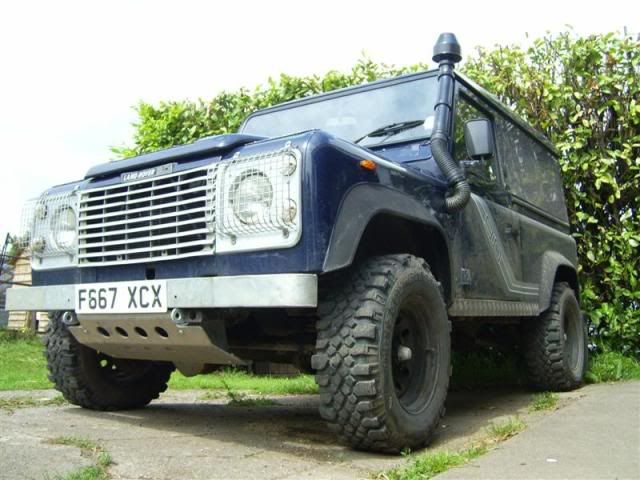
For my birthday I received a snorkel from my fiance and a heavy duty aluminium steering guard from my parents - how well do they know what I like :)
After about a minute I discovered that the snorkel wouldn't fit :( My TD Landy doesn't have a TD nearside wing for the air intake which is where the snorkel fits. That's now a job for another day that will involve cutting holes in my Landy and some jiggery pokery!
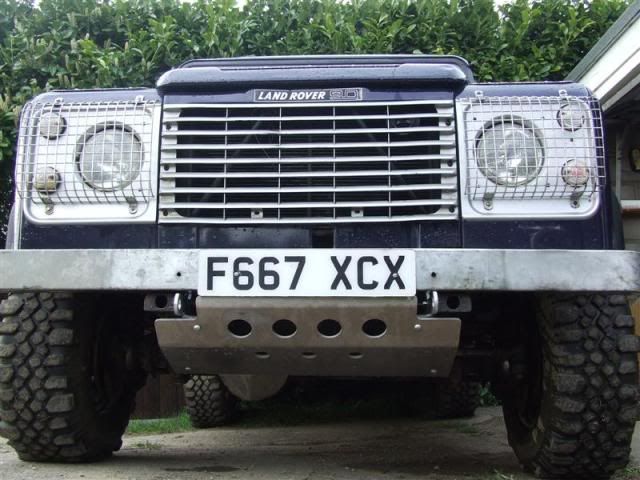
I then went about fitting the steering guard which had it's own issues. It is a 3 piece type guard which are easier to fit but as I have an A bar then it wouldn't fit as the A bar hangs too low and obstructed the guard. In the end I decided to remove the A bar and relocate the number plate as I prefer the look of the guard.
And here it is!
After about a minute I discovered that the snorkel wouldn't fit :( My TD Landy doesn't have a TD nearside wing for the air intake which is where the snorkel fits. That's now a job for another day that will involve cutting holes in my Landy and some jiggery pokery!
I then went about fitting the steering guard which had it's own issues. It is a 3 piece type guard which are easier to fit but as I have an A bar then it wouldn't fit as the A bar hangs too low and obstructed the guard. In the end I decided to remove the A bar and relocate the number plate as I prefer the look of the guard.
And here it is!
Thursday, 23 April 2009
Front hubs
After 2 of the drive member bolts shearing and the other ones looking likely to do the same I didn't want to risk spending a day trying to sort out out myself due to a lack of time! I asked my local mechanic to sort it out for me and also take a look at the front o/s hub as it sounded like the bearing was making a noise.
He managed to sort out the sheared bolts etc for me and discovered that the o/s front bearing was completely shot and had welded itself to the hub!!! Anyway, new bearing fitted and all is well again now :)
He managed to sort out the sheared bolts etc for me and discovered that the o/s front bearing was completely shot and had welded itself to the hub!!! Anyway, new bearing fitted and all is well again now :)
Sunday, 5 April 2009
Grrrrr, not more sheared drive member nuts!!!
After the nightmare I had getting the rear nearside drive member nuts off I thought I better do some preventative maintenance and remove and coppaslip the fronts too. The offside front ones came off no problem and were greased, replaced and torqued up (65). The nearside ones weren't quite as easy and I only managed to remove two of them. Even after blasting them with WD40 and giving them some heat they wouldn't budge and when I put my large breaker bar on them I managed to shear 2 of them off so far - not good!
Looks like I'll be stripping down and rebuilding the front hubs etc now too, arghhh!!!
Looks like I'll be stripping down and rebuilding the front hubs etc now too, arghhh!!!
Saturday, 4 April 2009
Rear bump stop and reverse light switch
The reverse light stopped working a couple of days ago which made it "interesting" reversing down our dark lane to the garage at night. It would come on as you put it into reverse and then go out virtually straight away. I looked up how it works and there is just a switch that screws into the top rear of the gearbox. This is dead easy to get to by removing the middle seat cushion section and unscrewing the cover beneath that. It just required another full turn clockwise into the gearbox housing and now works perfectly again :) While I had the cover off I used the opportunity to give the handbrake mechanism a good clean and grease too.
I noticed that the rubber from the offside rear bump stop was missing so thought I better replace it. I got the new part (basically a big chunk of rubber moulded to a metal bracket) and hoped it would just be a case of unbolting the old one (just the rubber was missing)... I managed to get both bolts half undone but as they are well rusted on and with a socket on the bottom and open ring spanner on top (can't get anything else on) I can't get enough pressure to remove them anymore :( Looks like a job for the angle grinder when I have time to attempt it again!
I noticed that the rubber from the offside rear bump stop was missing so thought I better replace it. I got the new part (basically a big chunk of rubber moulded to a metal bracket) and hoped it would just be a case of unbolting the old one (just the rubber was missing)... I managed to get both bolts half undone but as they are well rusted on and with a socket on the bottom and open ring spanner on top (can't get anything else on) I can't get enough pressure to remove them anymore :( Looks like a job for the angle grinder when I have time to attempt it again!
Friday, 3 April 2009
Back in business :)
Well today I managed to get hold of some replacement driver member bolts. They were a pain to get hold of though as 3 local Landy places (including main dealer!) didn't have any in stock!!! In the end I got some off an old axle one of the Landy garages had laying around :)
So now everything has been rebuilt so let's just hope the lock up problem doesn't reappear!!!
So now everything has been rebuilt so let's just hope the lock up problem doesn't reappear!!!
Subscribe to:
Posts (Atom)